Imagine investing a significant amount of money and three months to create a WordPress website, only to launch it and watch it load in just seven seconds, rank nowhere on Google, and produce no leads.
This is not a rare story. This is happening to companies daily that decided not to go through the fundamentals of a correct WordPress development process. Not because WordPress is faulty, but due to the design process behind the build being rushed, unplanned, or assigned to the wrong team.
It has never been easier yet more competitive to build a WordPress website in 2026. The tools have improved, the block editor has matured, AI is revolutionizing how developers write code, and Google’s page experience standards are more demanding than ever. How you do it the right way — from day one.
This guide takes you through the whole process of WordPress development from project planning and setting up a local environment to custom development, SEO, testing, deployment, and long-term maintenance. Whether you’re going to build your site yourself or if you just want a better understanding of what the right WordPress development company should be providing, this is the only guide in 2026.
Step 1: Project Planning and Requirements Gathering
Every successful WordPress project begins long before a line of code is written. You will find out everything that you need on this page to help you set up how your website becomes.
Poor planning is, unfortunately, the leading cause of missed deadlines, budget overruns, and websites that simply do not work. A good project brief is a one- to two-day investment that avoids weeks of confusion during development.
What to Define During Planning
Custom business objectives: What do we even want the website to accomplish? Lead generation, e-commerce sales, brand awareness, appointment bookings, or content publishing? Related to this is the need to be clear on what people can expect.
Target audience: Outline your visitor personas—who they are, what you need to give them, and why they would convert on your site
Website type: Brochure site, WooCommerce store, membership platform, a blog, or a custom web application?
Feature set: Document every page, form, integration, and piece of functionality required at launch—and what can wait for phase two.
Budget and timeline: Establish achievable expectations from the beginning. Doing a custom WordPress project right is not instant. Hasty development is costly to correct.
Competitive research: Also look at five competitors’ sites. Take note of what they are doing well, where the gaps lie, and where you can improve.
Tools to Use
Notion or Trello for managing requirements and tracking tasks
Google Docs for writing the full project brief
Figma or Miro for wireframes and user flow diagrams
Step 2: Setting Up the Development Environment
Before doing anything on a live box, one of the most considered and often skipped steps in the WordPress development process is setting up a proper local development environment.
One of the most common and costly mistakes in WordPress development is building or editing a website directly in production. One bad plugin upgrade or buggy code snippet later, and your live site is down.
Tool
Best For
Cost
Ease of Use
Local by WP Engine
Beginners and professionals
Free
Very Easy
DevKinsta
Kinsta hosting users
Free
Easy
XAMPP / MAMP
Traditional server stacks
Free
Moderate
Docker + WordPress
Advanced team environments
Free
Complex
Lando
Multisite and agency workflows
Free
Moderate
Local by WP Engine is still the most common choice in 2026. It provides a fully working, customized WordPress installation within minutes. an SSL, a fresh database manager, and no configuration needed in their local domain.
Install your theme and all required plugins once your local site is up and running, and do all that development work in that environment. Only push changes to your live server that are tested and stable.
Step 3: Choosing the Right Theme and Plugins
If you choose a wrong theme where there are hundreds of thousands of unnecessary plugins, it would eventually kill the performance, security, and maintainability. This step of the WordPress development process requires serious thought, not a few mousedown events on the prettiest-looking theme you see in preview mode.
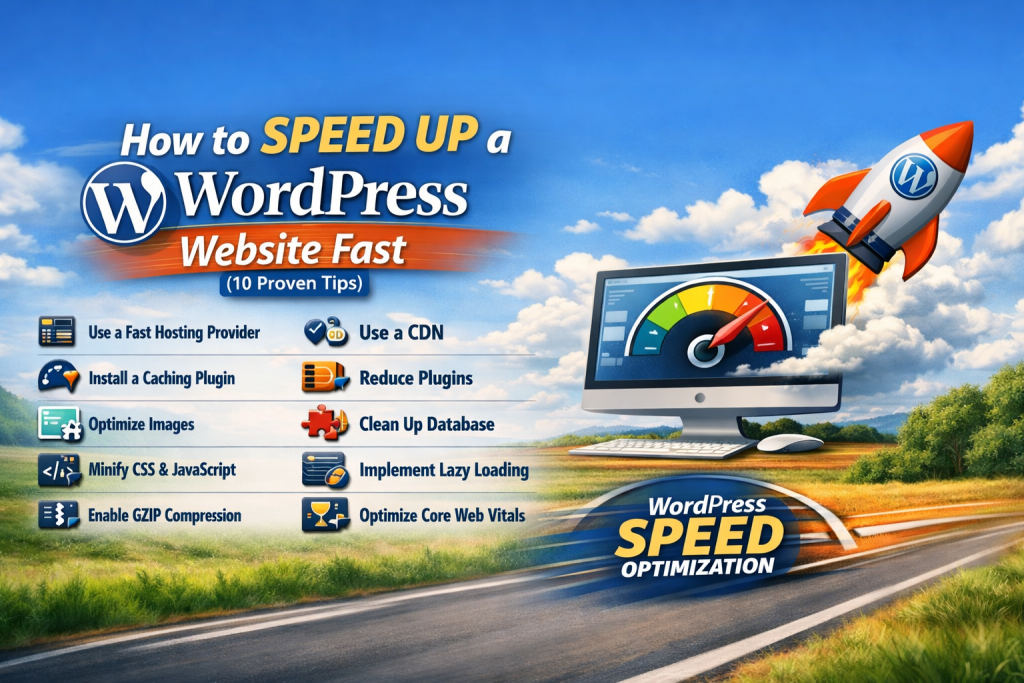
Choose a thin base theme: Astra, GeneratePress, and Kadence are the clear winners in 2026. All of these are built for speed, fully compatible with the block editor and highly customizable.
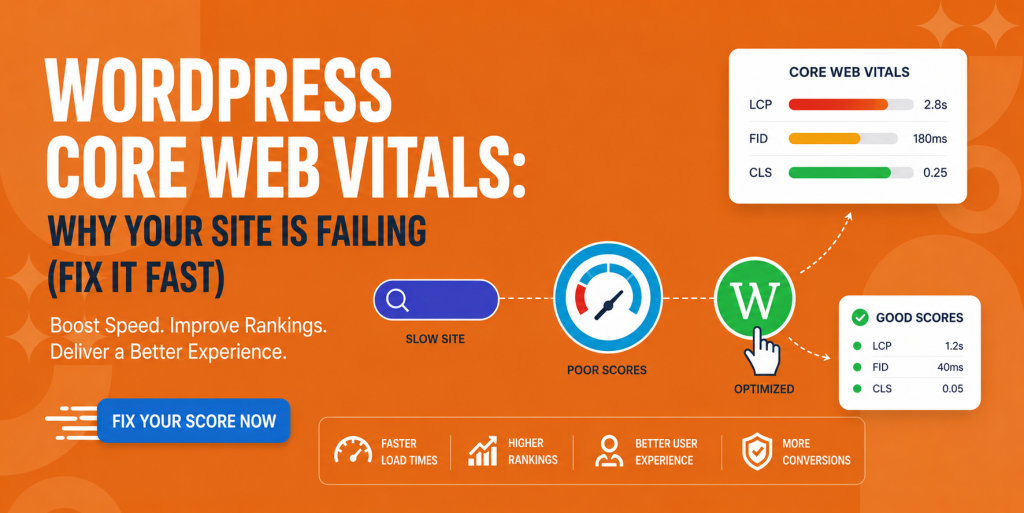
Test for Core Web Vitals compliance: Your theme should meet Google’s CWV first-class benchmarks: LCP less than 2.5 seconds, CLS less than 0.1, and INP less than 200 ms from the ground up.
Stay away from bloated multipurpose themes: They include hundreds of features you will never use, adding unnecessary code bloat that slows your site down from day one.
Look at Full Site Editing (FSE) themes: Block-based FSE themes now represent the WordPress standard in 2026. They provide total design freedom via the block editor without ever having to edit PHP template files.
Page Builder: Elementor, Bricks Builder, or native Gutenberg
Security: Wordfence or Solid Security
Performance and Caching: WP Rocket, LiteSpeed Cache, or W3 Total Cache
Backup: UpdraftPlus or BlogVault
Forms: WPForms or Gravity Forms
Image Optimization: Imagify or ShortPixel
E-commerce (if needed): WooCommerce
Step 4: Designing the Website
Design is not decoration — it’s strategy. In the WordPress development life cycle, the website design phase dictates how users will feel about your site when they visit yours and whether they’ll become customers or bounce in seconds.
Before any page of your WordPress site is built, there is a design system in place for a professionally created site. This way, each page has a consistent look and feel—with scaled-up development speed!
Design Best Practices for 2026
Mobile-first: In 2026, mobile devices account for over 63% of web traffic. Design small first, then scale up to desktop—not the other way around.
Consistent branding: use 2-3 brand colors and stick with one or two fonts & consistent icon styles. Visual inconsistency is trust destruction and gives a feeling of an unfinished site.
Benefit from eye direction: The heading sizes, white spaces, and contrast help the readers to go through the layout by following the important content and next steps.
Above-the-fold CTA: The most important call to action on your site needs to be above the fold (where a user lands and does not have to scroll)—mobile users, in particular, have the shortest attention span.
Accessibility (WCAG 2.2): Verify color contrast ratios, fully descriptive alt text for images, and keyboard navigability of the site.
Recommended Design Workflow
Create desktop and mobile wireframes in Figma before opening WordPress
Get client or stakeholder sign-off on the design before any development begins
Build a style guide documenting colors, typography, spacing, and reusable components
Translate Figma designs into WordPress using Elementor, Bricks Builder, or native Gutenberg blocks
Professional WordPress development companies will always have a documented design system before the first page is built for a well-designed website. This is one of the most obvious indicators of a good team.
Step 5: Custom Development and WordPress Customization
Not every single WordPress project needs custom code—but when it does, this is where a professional WordPress development company really shows its expertise. Custom development takes a one-size-fits-all template site and creates an engine completely tailored to your business needs.
Common Custom Development Requirements
Be careful of custom child theme development. Do not directly edit a parent theme—you’ll lose every single change in the next theme update.
Custom post types (CPTs) and taxonomies → For portfolios, case studies, team profiles, services directories, and any content type you may want to structure beyond posts and pages.
Custom Gutenberg blocks: Create reusable, theme/brand-specific block components by leveraging React and the WordPress Block Editor API. That’s a modern, future-proof way in 2026.
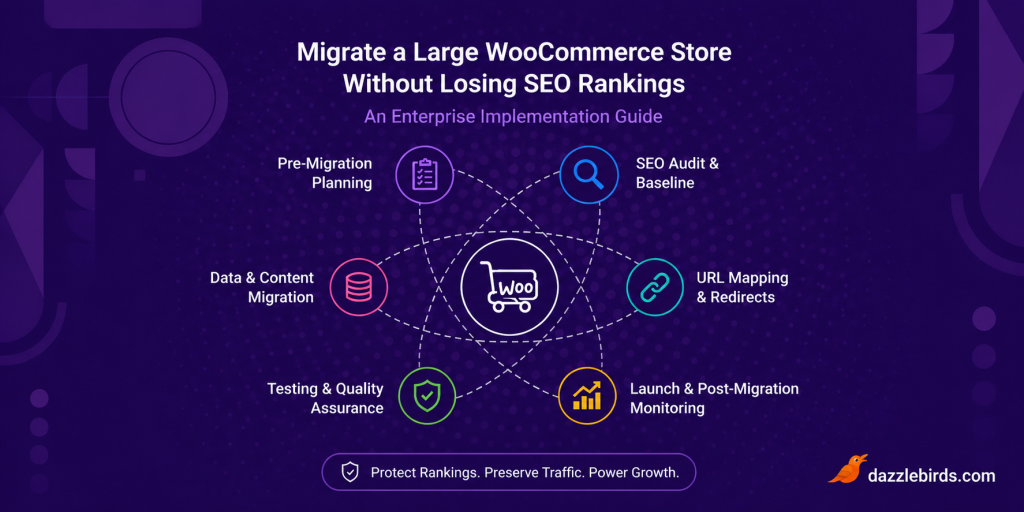
WooCommerce KPIs improve via custom checkout flows, product templates, and dynamic pricing rules integrated with payment gateways based on business models.
REST API and headless integrations: Integrate WordPress with CRMs—such as HubSpot or Salesforce—marketing platforms like Mailchimp or ActiveCampaign, and third-party analytics dashboards.
AI-enhanced functionality: By 2026, a larger number of WordPress projects are making use of AI services—chatbots, content assistants, and dynamic personalization made possible with OpenAI tools and comparable APIs.
Development Standards Every Professional Follows
Use WordPress Coding Standards for PHP, HTML, CSS, and JavaScript.
Version control such as Git—push to GitHub or Bitbucket on every change that matters.
Never write custom code directly in the live production site; only write it in a staging or local environment.
Always sanitize and validate user input; use WordPress nonces to secure forms; and properly escape output.
Step 6: Content Creation and On-Page SEO
A stunningly designed, perfectly coded website is useless if your content doesn’t rank, engage, and convert. SEO and content are not afterthoughts in the WordPress development process—they’re built into each page by default.
In 2026, E-E-A-T (experience, expertise, authoritativeness, trustworthiness) is what Google’s algorithms value most. Each page you publish needs to prove actual authority and offer true value to the end-user.
Content Planning Framework
Create a content map: List every page on the site, what its purpose is, what its main keyword would be, who it is aimed at, and what visitors would be hoped to do.
Make sure your matched content is what the user searches for: Informational, navigational, commercial, or transactional. Every page needs a simple, clear, and targeted intent.
Adopt a pillar and cluster approach: Develop the mother of all pages—a services page for WordPress development—and build a supporting cast of related blog articles linking back internally.
Quality wins over quantity: one well-researched 2,500-word post ranks higher in organic search and commands more time on page than five shallow 500-word ones.
On-Page SEO Checklist for Every Page
Primary keyword in the H1, first 100 words, at least two H2 subheadings, URL slug, and meta title
Meta title between 50 and 60 characters; meta description between 150 and 160 characters
Secondary and LSI keywords used naturally throughout — never forced or repeated awkwardly
All images optimized with descriptive file names and keyword-rich alt text
Structured data (schema markup) for articles, FAQs, services, and reviews where applicable
3 to 5 internal links pointing to relevant service pages and supporting blog content
At least 2 external links to authoritative and relevant sources to build page credibility
Step 7: Testing Your WordPress Website
Never skip testing. Testing is not just a checkbox but a systematic approach to ensure everything works on your site, that it gets shown before actual users and search engines prior to launch.
Performance and Speed
Google PageSpeed Insights score above 90 on both mobile and desktop
GTmetrix Grade A with fully loaded time under 3 seconds
Core Web Vitals: LCP under 2.5 seconds, CLS under 0.1, INP under 200ms — note that INP replaced FID as a Core Web Vital in 2024 and many sites still fail it in 2026
Cross-Browser and Device Testing
Test on Chrome, Firefox, Safari, and Edge — on both desktop and mobile
Test on real iOS and Android devices, not just browser device emulators
Use Google’s Mobile-Friendly Test tool to confirm full mobile usability
Functionality Testing
Submit every contact form, newsletter signup, and checkout flow and confirm delivery
Test all buttons, navigation menus, dropdowns, sliders, and interactive elements
Verify all third-party integrations — CRM, payment gateways, analytics — are working correctly
SEO and Technical Checks
Run Screaming Frog or Sitebulb to find all broken links and crawl errors
Verify the XML sitemap is generated, accessible, and contains all intended URLs
Confirm canonical tags and robots.txt are correctly configured and not blocking indexing
Check all page title tags and meta descriptions are unique and fully present
Security Checks
Run a Wordfence or Sucuri security scan before launch to identify any vulnerabilities
Confirm SSL is active and all HTTP URLs redirect to HTTPS correctly
Check for mixed content warnings — HTTP assets loading on HTTPS pages
Step 8: Deployment and Going Live
Deployment is the most technically sensitive phase of WordPress development. Poor configurations during launch can lead to downtime, missing data, or a site that isn’t working correctly. Eliminating that risk completely requires a structured go-live checklist.
How to Choose the Right Hosting in 2026
Your hosting provider is the bedrock upon which everything else stands. Go for managed WordPress hosting by providers such as Kinsta, WP Engine, SiteGround, or Cloudways. They all come with server-level caching, CDN integration, daily backups, and a built-in staging environment.
Step-by-Step Deployment Checklist
Back up your complete local or staging database and all site files before the migration.
For the first time, it must be deployed to a staging URL in the live server, and all tests must run again on prod.
Use All-in-One WP Migration, Duplicator, or WP Migrate DB to migrate the site cleanly.
Update wp-config.php. Configure the PHP with associated live server database credentials.
Changing Site URL and Home URL in WordPress Settings or from WP-CLI
First, update your domain’s DNS to point to the new hosting server and wait for propagation.
Enable and validate the SSL certificate — make sure that all pages are loading with HTTPS.
Before announcing the launch, test every page/form/checkout flow directly on the live URL.
Add your XML sitemap in Google Search Console and look for crawl errors.
Implement Google Analytics 4 (GA4) and confirm tracking fires as intended.
Configure uptime monitoring using UptimeRobot or a comparable free service.
Enable core installation automatic security updates in WordPress.
Step 9: Ongoing Maintenance and Continuous Improvement
Your WordPress website launching is not the end — it’s just the beginning. The WordPress development lifecycle does not conclude at the deployment stage. It is those which are maintained regularly and consistently that will eventually rank, convert, and grow!
Recommended Maintenance Schedule
Weekly: WordPress core, all themes and plugins up to date. Searching for Security Alerts and Plugin Vulnerabilities Check uptime monitoring logs for downtime incidents.
Monthly: Check Google Analytics and Search Console data — traffic drops, crawl errors, keyword movement. Run PageSpeed Insights and address any performance regressions. Audit and repair broken links.
Every three months: Run a full SEO audit with Screaming Frog, Ahrefs, or Semrush. Update your three to five highest-traffic blog posts with new information and statistics. Take a look at your plugin stack and remove any unused or outdated plugins.
Annually: Review your hosting plan for performance and scalability. Test the entire site hierarchy and user experience. If the site is more than two to three years old, think about a design refresh.
Content and SEO Ongoing Strategy
The goal is to consistently increase organic traffic over time by publishing 2-4 blog posts that target long-tail keywords every month.
How you can train on existing posts every 6 months where now you have more data, new statistics, and well-structured content.
Increase your domain authority with guest posting, digital PR outreach projects, and partnerships with industry players.
Track Core Web Vitals every month in Google Search Console and fix all reported issues promptly to prevent ranking drops.
Step 10: 2026 Trends Every WordPress Developer Should Know
The WordPress development process as of 2026 looks significantly different from even a couple of years prior. They are the trends defining how today’s professional WordPress websites are constructed, optimized for performance, and maintained.
Full Site Editing (FSE) Is Now the Standard
By 2026, block-based full-site editing has reached maturity. Conventional themes are being displaced as a growing number of FSE themes provide total design control utilizing the block editor without requiring PHP template documents for styling. As a WordPress developer, if you are not building or recommending FSE-ready themes into your workflow, then you have already come off the curve.
AI-Assisted WordPress Development
AI tools are now ingrained in the WordPress development workflow. Developers are using GitHub Copilot and other assistants to produce boilerplate code more quickly, AI-driven SEO tools to optimize content at scale, and AI chatbots in WordPress sites themselves to qualify leads and answer questions from visitors on the fly.
Headless WordPress Is Growing in Enterprise Projects
A larger number of high-traffic websites and enterprise clients are implementing headless WordPress, which involves using the content management capabilities of WordPress as a backend and serving the frontend through frameworks like Next.js or Nuxt.js. And delivers amazing performance and dev flexibility for more complex, high-scale projects.
INP Is Now a Core Web Vital
Interaction to Next Paint (INP) was formally introduced as a Core Web Vital in 2024, and many WordPress sites are still not meeting it in 2026. Responsive to all user interactions, not just the first one. INP is responsiveness across your whole site, not just the first interaction. A regular part of any performance review from professional WordPress development services are an audit of INP, which, in turn, can be optimized.
Security-First Development Is Non-Negotiable
Due to WordPress’s web share, it also is the most attacked CMS. In fact, in 2026, the best WordPress development company will build security into the architecture from day one, not as a plugin that you install at the end and think about later.
Conclusion: Build It Right the First Time
WordPress development is not a set of short cuts, but rather an organized approach. This guide’s steps are all necessary because failing to follow them has resulted in real websites performing poorly, real budgets going over budget, and real businesses missing out on growth they were due.
Here Is the Complete Roadmap
Step 1: Define your goals and write a clear, detailed project brief
Step 2: Set up a local development environment before touching anything on a live server
Step 3: Choose a lightweight, performance-optimized theme and a lean, purposeful plugin stack
Step 4: Design mobile-first with a documented style guide and stakeholder approval before building
Step 5: Develop custom features following WordPress coding standards with version control throughout
Step 6: Build SEO into every page from day one — keyword strategy, internal links, and schema markup
Step 7: Test across devices, browsers, performance tools, and security scanners before going live
Step 8: Deploy with a structured checklist and verify every function on the live URL
Step 9: Maintain, monitor, and continuously improve your site after launch
Step 10: Stay current with 2026 trends — FSE, AI integration, INP, and headless WordPress
The difference between a website that sits quietly in the background and one that actively generates traffic, builds trust, and grows your business month after month is to follow this WordPress development process step by step.
It takes real experience, careful planning, and genuine expertise to build a WordPress website correctly. Work with a team that is passionate about WordPress development every day if you want a website that is designed to function rather than just be launched.
Every stage of this process is covered by DazzleBirds’ WordPress development services, from the initial planning call to performance tracking following launch. We create scalable, secure, and quick WordPress websites designed for actual business expansion. Our team of knowledgeable WordPress developers is prepared to assist you whether you require a fully customized web platform, a professional document site, or a custom WooCommerce store.
The WordPress development process is a structured series of steps used to plan, design, build, test, and launch a WordPress website. It includes project planning, setting up a local development environment, choosing the right theme and plugins, designing the website, custom development, content creation, SEO optimization, testing, deployment, and ongoing maintenance. Following a proper WordPress development process step by step ensures your website is fast, secure, and built to generate real business results.
The timeline depends entirely on the complexity of the project. A simple 5-page brochure site typically takes 2 to 4 weeks from planning to launch. A custom WooCommerce store or membership platform can take 8 to 16 weeks. Working with an experienced WordPress development company that follows a structured process significantly reduces the timeline and the number of revision cycles needed.
If your website needs custom functionality, advanced integrations, high performance, or a clean, scalable architecture, you should hire WordPress developers with proven experience. DIY page builders like Elementor work well for simple sites with a modest budget. However, for business-critical websites where performance, SEO, and lead generation matter, investing in professional WordPress development services always delivers a better long-term return.
A professional WordPress development company handles the entire website build from start to finish—including requirements gathering, UX design, theme development, custom plugin development, SEO setup, performance optimization, testing, deployment, and post-launch maintenance. At DazzleBirds, our WordPress development services are built around a structured process that ensures every website we deliver is fast, secure, and engineered for business growth.
WordPress development costs vary based on project complexity. A professionally built brochure website typically starts from $1,500 to $3,000. A custom WooCommerce store or complex web platform can range from $5,000 to $20,000 or more depending on features and integrations. Choosing cheap development almost always costs more in fixes, rebuilds, and lost business over time. Investing in quality wordpress development services from day one is always the smarter business decision.