Before you migrate a CMS, audit your content, URLs, SEO data, plugins, integrations, user accounts, and site speed. Then back up everything and test the move on a staging site. This CMS migration checklist walks you through each step.
Most migrations don’t fail on launch day. They fail weeks earlier, when nobody checks what the old site really holds. A missed redirect here. A broken form there. Then rankings drop and sales slow down.
You can avoid that. A good audit takes a few days and saves months of repair work. So grab a spreadsheet, work through each section, and tick every box.

What Should You Audit Before Migrating a CMS?
Audit eight areas before you move anything:
- Goals and scope: why you move and what must come along.
- Content: pages, posts, media, and custom fields.
- URLs: every live address and its redirect plan.
- SEO data: titles, meta tags, schema, and rankings.
- Features: plugins, forms, search, and integrations.
- Users and data: accounts, orders, and permissions.
- Design: templates, layouts, and mobile views.
- Speed and security: load time, SSL, and backups.
Each area has its own section below. Together, they form your pre-migration checklist.
Step 1: Set Your Goals and Scope
Start with the “why.” Do you want to cut hosting costs? Do you need easier editing? Is your old CMS slow, or does the vendor no longer support it?
Write the answer down. It guides every choice later.
Next, list what moves and what stays. Not every old page deserves a new home. Some belong in the bin.
Then name your team. Pick one owner for content, one for SEO and one for tech. Add a due date to each task. A clear plan keeps the project on track.
Here’s the catch. A pre-migration checklist only works when people own it. Give every line an owner and a date. If a line has no name beside it, it won’t get done.
Also set your success measures now. Pick two or three numbers, such as organic traffic, page load time and form leads. You will compare them after launch.
Step 2: Run a CMS Migration Audit on Your Content
You can’t move what you haven’t counted. So begin with a full content inventory.
Crawl your site with a tool like Screaming Frog or Sitebulb. Export every URL into a spreadsheet. Add columns for page type, monthly traffic, backlinks, and status.
Then sort each page into one of three groups:
- Keep: pages that bring traffic, leads, or sales.
- Merge: thin pages that cover the same topic.
- Remove: old, empty, or duplicate pages.
This step saves money. Every page you skip is a page you don’t have to move, test, or fix.
Check the small things too:
- Images, file names, and alt text
- PDFs and downloads
- Videos and embeds
- Custom fields and tags
- Categories and taxonomies
- Author names and publish dates
Custom content types need extra care. A product catalog or a job board often uses fields that don’t map one-to-one. Move a small batch first. Then compare the old and new pages side by side.
Step 3: Audit Every URL and Redirect
Your URLs hold your SEO value. Change them without a plan, and you lose it.
Export all live URLs from your crawl, your XML sitemap, and Google Search Console. Add pages that have backlinks, using a tool like Ahrefs or Semrush. Merge the lists and remove duplicates.
Now pick the new URL for each page. Keep the same structure when you can. That’s the safest path.
When a URL must change, map it to the new address with a 301 redirect. Build a redirect sheet with two columns: old URL and new URL. Point each old page to its closest match.
Don’t send everything to the homepage. Search engines often treat that as a soft 404.
Also check these:
- Trailing slashes and capital letters
- URL parameters and filters
- Redirects that already exist
- Redirect chains that hop more than once

Step 4: Audit Your SEO Data
SEO data lives in many places. Some of it hides in plugins and theme code. Take a full copy before you touch anything.
Record this for every key page:
- Title tag and meta description
- H1 and heading structure
- Canonical tags
- Schema markup
- Hreflang tags, if you run a multi-language site
- Internal links
- Open Graph and social tags
Next, save a ranking snapshot. Pull your top keywords, clicks, and impressions from Google Search Console. Export your Google Analytics reports as well. You need a baseline to compare against after launch.
Check your robots.txt file and sitemap too. A stray noindex tag or a blocked folder can wipe out traffic within days. It happens more often than it should.
Do you run an online store? Then read our guide on WooCommerce migration without losing SEO. It covers product URLs, category pages, and structured data in detail.
Step 5: Audit Features, Plugins, and Integrations
Your old CMS does more than show pages. So list every feature it runs.
Think about forms, site searches, comments, login areas, newsletters, payment gateways, and booking tools. Don’t forget tracking scripts. Tag managers, Meta Pixel, and CRM codes often sit deep inside templates.
For each feature, ask: Does WordPress have a plugin for it? Do we still need it? Does it need custom code? Then match each feature to a tool.
| Old feature |
Common WordPress option |
| Contact forms |
WPForms, Gravity Forms, Fluent Forms |
| Site search |
SearchWP, Relevanssi |
| Online store |
WooCommerce |
| SEO settings |
Yoast SEO, Rank Math |
| Caching and speed |
WP Rocket, LiteSpeed Cache |
Next, list every outside system your site talks to. That includes your CRM, ERP, email tool, analytics, and payment provider. Test each API key and login. Note who owns each account.
Missing keys cause the most last-minute stress. Find them now.
One more tip: fewer plugins is better. Each plugin adds code and risk. Pick well-supported ones and skip the rest.
Step 6: Audit Users, Data, and Security
People and data need a safe trip.
Start with users. Export all accounts and roles. Decide who needs access on the new site. Many systems store passwords in a format WordPress can’t read. So plan a password reset email for your members and customers.
Running a store? Check orders, customers, coupons, subscriptions, and reviews. Count them before and after the move. The numbers must match.
Now look at security. Check your SSL certificate, firewall, and backup setup. Remove old admin users. Scan for malware before you move, or you will move the problem too.
Privacy matters as well. If you serve visitors in the UK, EU, or US, check that your cookie consent tool and privacy pages still work on the new site.
Step 7: Audit Design and Site Speed
Your new theme won’t match the old one pixel for pixel. That’s fine. But you should know which parts matter.
Take screenshots of your key templates: home, category, product, blog post, and contact page. Note the parts that drive action, such as buttons, banners, and forms.
Then test speed. Run Google PageSpeed Insights and save your Core Web Vitals scores. The new site should match them or beat them.
Check mobile views too. Many visitors browse on their phones. Test basic accessibility as well, such as color contrast, alt text, and keyboard use.
How to Turn Your Audit Into a Plan
Now you have a long list of findings. Don’t try to fix everything at once. Sort the list by risk.
| Priority |
What it covers |
Example |
| Must fix |
Anything that can cost traffic, data, or sales |
Missing redirects, broken checkout, lost tracking |
| Should fix |
Anything that hurts users or speed |
Slow templates, weak mobile layout |
| Nice to have |
Anything that can wait until after launch |
Design polish, extra features |
Fix the “must” row before launch. Schedule the rest. This keeps your launch date safe and your team calm.
Your CMS Migration Checklist for Launch Week
The audit is done. Now you prepare for the move. Use this website migration checklist in your final week.
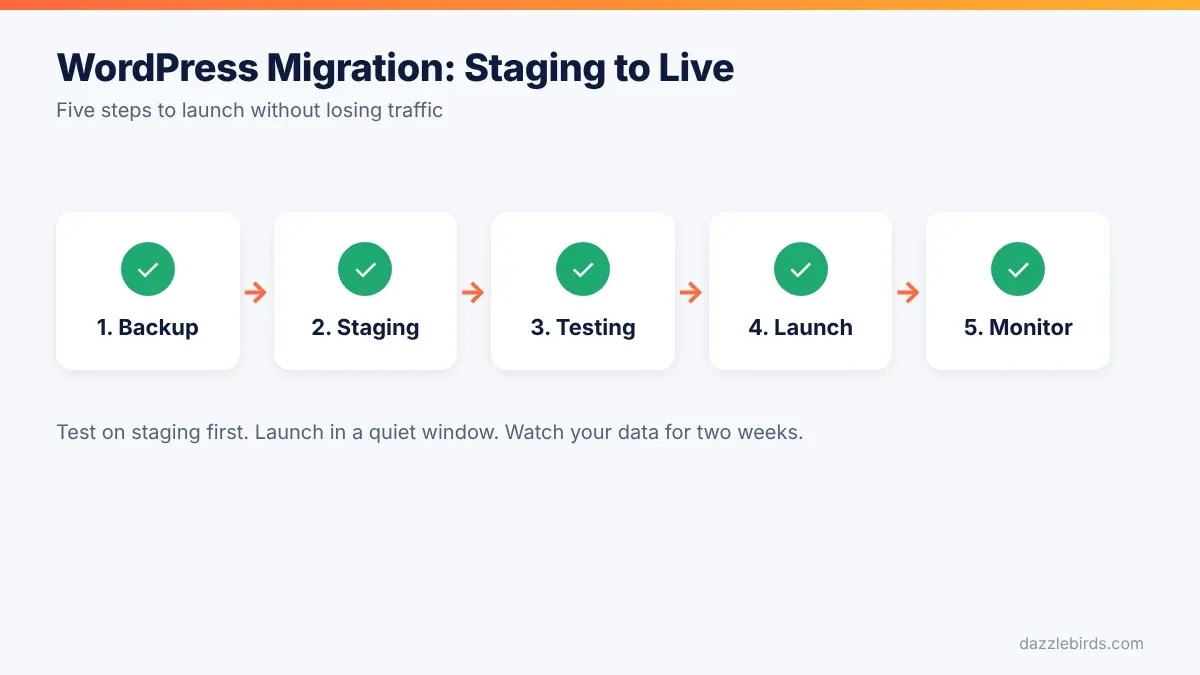
- Back up everything. Save files, the database, and a full copy of the old site. Store it off the server.
- Build on staging. Never test on a live site. Our WordPress staging site checklist shows you how to set one up.
- Block search engines on staging. Use a password or a noindex tag. Remove it at launch.
- Move content and test. Compare counts for pages, posts, media, and users.
- Load your redirects. Test 20 to 30 old URLs by hand. Then crawl the full list.
- Check SEO tags. Review titles, metas, canonicals, schema, and sitemaps.
- Test every form and checkout. Place a real test order.
- Lower your DNS TTL. Do it a day early so the switch runs fast.
- Launch in a quiet window. Pick a low-traffic time.
- Watch closely. Check Search Console, analytics, and error logs every day for two weeks.
Keep your old site alive for a while after launch. It gives you a fallback and a point of reference.
Migrate to WordPress Checklist: Platform Notes
This list looks similar for every source platform. But each CMS has its own traps.
- Sitecore: Content often ties to templates, workflows, and personalization rules. Our Sitecore to WordPress migration guide explains how to handle them.
- Joomla: Extensions, categories, and custom fields need careful mapping. Read our Joomla to WordPress migration guide for the steps.
- Shopify, Magento, Drupal, and others: Product data, URL patterns, and custom modules need their own audit.
Whatever your source, the audit steps stay the same. Only the details change.
Common Mistakes to Avoid
I see the same errors again and again. Watch for these:
- Skipping redirects. This causes the biggest ranking drops.
- Moving junk. Clean first. Then migrate.
- Forgetting tracking codes. You lose weeks of data.
- Launching on a Friday. Bugs don’t take weekends off, but your team does.
- Testing only on desktop. Check phones and tablets too.
- Having no rollback plan. Know how to go back before you go forward.
Ready to Move? Let Dazzlebirds Handle the Migration
A good audit saves time. But you don’t have to do it alone.
Dazzlebirds plans and runs CMS to WordPress migrations for businesses in the UK, the USA, and worldwide. We audit your site, protect your SEO, and launch on schedule.
Get Your CMS to WordPress Migration Plan →
FAQs
A CMS migration checklist is a list of tasks you finish before, during, and after you move a site to a new CMS. It covers content, URLs, SEO, features, data, and testing. It helps you avoid lost traffic and broken pages.
Include your goals, a content inventory, a URL and redirect map, an SEO baseline, a list of plugins and integrations, user and order data, backups, and a staging site. Add an owner and a due date to each item.
It depends on site size. A small brochure site may need a few days. A large site or online store can take a few weeks. Custom features and many content types add time.
Not if you plan well. Keep your URLs where you can, set 301 redirects, copy your meta tags, and test on staging. Small, short-term dips can still happen, so track your rankings after launch.
Yes. A staging site lets you test content, redirects, forms, and checkout without risk to your live site. Fix every bug there first, then launch.



 WooCommerce Solutions
 Solutions for WordPress