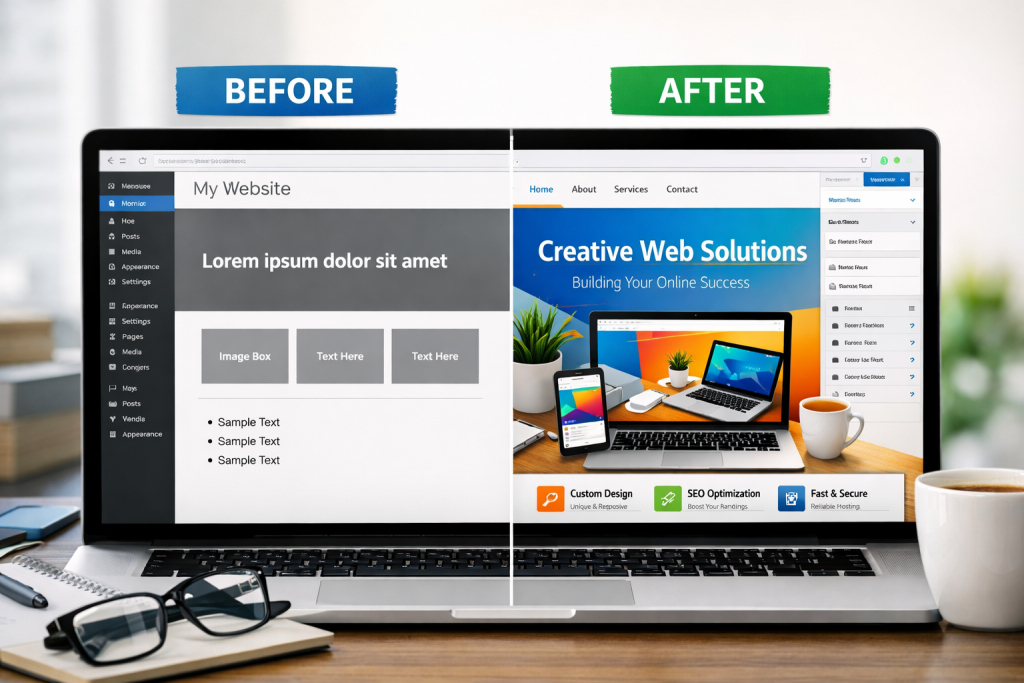
Picture this. You spent the entire afternoon searching for WordPress themes until you found one that appeared beautiful in its preview. You installed it and activated the live view function, but your disappointment began when you saw the website display. The website design appeared identical to standard internet websites. The website design showed incorrect color usage, and the fonts appeared rigid while all elements failed to represent your business identity and personal style.
This is the exact moment most beginners give up. The people choose to develop their websites at an average level because they believe that improving their website design needs either professional developers or considerable financial backing or extensive technical expertise. The statement lacks any truth.
You can achieve complete website transformation through WordPress theme setting customization when you master proper customization methods. You do not need to write any code because you can choose to work without it. This guide will show you the complete process because it uses built-in tools and advanced options to help you design every element of your project.
The guide provides practical guidance for developing all three types of websites, which include personal blogs, portfolio websites, and e-commerce sites. The guide shows you the appropriate point to use custom WordPress development when your project reaches a size that exceeds your capability to manage.
Why You Should Customize Your WordPress Theme
The moment you install a new WordPress theme, everybody who installs it will have the same look of that particular theme. It is not part of your brand, your audience, or the vibe you want to leave with visitors on your website. And this is also why the very first thing on a serious website should be customizing WordPress theme settings and personalization completely.
Remember the last time you pixelated your site with something we call a common template or outdated theme? Did you trust it enough to purchase something—or submit your contact information? Probably not. Studies found that humans form impressions about websites in less than one second. A neat, uniform, and on-brand site tells every visitor from the get-go that you’re professional, well-founded in your stance, and worth their time and attention.
Customizing your appearance is one thing, but customizing what goes on under the hood directly shows how well your website performs. Providing simple navigation, readable fonts, a fast loading time of the pages, and call to action buttons that blend seamlessly into your website will keep visitors engaged for longer. It reduces your bounce rate and helps you get more conversions—those could be sales, leads, or loyal readers.
Your website is usually your first impression and sometimes will be your only chance to impress a potential customer. A serious business doesn’t have the option of not having it looking and functioning to perfection. For those who want to go beyond what DIY can achieve, professional WordPress customization services are available that transform an off-the-shelf theme into a one-of-a-kind digital experience truly reflective of its brand—something no template alone could deliver.
What Can You Actually Change on a WordPress Theme?
Before diving into the tools, it helps to understand exactly what is within reach. The following list shows the primary areas that users can modify in most WordPress themes:
Colors and Fonts — Replace the standard color scheme for your brand palette and update typography with something that complements not only your identity but also the tone of voice you want to achieve.
Site Icon — Change the default iPad, Facebook, and other site icons with your own logos.
Header & Footer — These are the two most read parts of any website. Both may be customized to feature navigation menus, contact details, social media links, and promotional banners.
Navigation Menus — Select which pages are displayed in your primary navigation, the order they should appear in, and if any items would expand in a dropdown submenu.
Widgets—like a search bar, recent posts list, or newsletter signup boxes, which you can drag into sidebars and footerlets.
Homepage Design—Choose between a simple blog feed as your homepage or an entirely designed static page that serves to introduce new visitors to what your brand is.
Background — Add a background color or full-page image that can provide your entire website with consistent and professional branding.
Knowing these areas clearly before you start means you will always know where to go when you want to change something specific.
Step 1: Start With the WordPress Customizer
The WordPress Customizer is the best place to begin for any beginner. This is a built-in tool and exists in every WordPress installation, so you do not need to install or download anything here.
Once you log in to your WordPress dashboard, over on the left side, go to Appearance and then click on Customize. The WordPress Customizer will show up in a split-screen view. Settings panel (left image) To the right is your website live preview that works instantaneously with your changes. Everything is private until you hit Publish, which gives you the freedom to try things without risking anything going public.
Here is what you can do inside the WordPress Customizer:
Site Identity—You can upload your logo, create a site title and tagline statement, and select a favicon (small icon appearing within the browser tabs while visitors visit your website).
Colors—Pick your brand colors for background, header, body text & link, and buttons all in one spot.
Header Image — Let us make a snap impression with a big, full-width image used in the header area.
Menus—Create custom menus and assign them to locations such as header, footer, or sidebar.
Widgets—Add, remove, and reorder content blocks in your sidebar/widget area footers.
Homepage Settings — Letting WordPress know if your homepage should display the most recent blog posts you have published or a specific static page that you created.
Custom CSS — If you are familiar with a little bit of CSS, enter your own style rules directly here and see them immediately updating the preview in real-time without editing any theme files at all.
The WordPress Customizer functions as the safest tool, which provides the greatest ease of use for beginners. Spend time here first. Most people discover their ability to make changes to the system without needing advanced tools.
Step 2: Go Deeper With WordPress Theme Editing
If you get comfortable with the customizer, then editing a WordPress theme offers an order of magnitude more control. This is where you get to the real files of your theme stylesheets, page templates, and function files that define every little visual or structure detail of your website.
To get started, visit your dashboard and go to Appearance → Theme File Editor.
On the right-hand side, you’ll see a list of files. The style is among them but is the most important one. Control all the visual styling for your colors, spacing, and typography that you apply throughout your site live in the functions. PHP file to define features and manage theme functions behind the scenes.
A very important warning: WordPress theme editing means that your live theme files will be directly modified! An error here and there can crash your whole website to a blank page. Always do a full backup before making edits in this area. Even better, use a child theme, and this is precisely what the next step entails—to keep your edits safely separated.
If your business requires momentous and frequent changes to theme files, then professional WordPress plugin development is a way of pairing those needed alterations with the original design in an organized manner. Custom plugins separate functionality from design, making both easier to interact with and update as needed over time.
Step 3: Protect Your Work With a Child Theme
This is something that many beginners only learn after dozens of hours wasted. You are doing such nice work to edit your theme files. Everything appears just like you wanted it. Then, one day the theme gets an update. You click “update.” And boom, all your customizations are overwritten and lost.
And this is where a child theme comes into play. A child theme is a separate file that sits on top of your main theme (the parent) and inherits all the design and functionality by default. All of your changes are stored inside the child theme. This means that when the parent theme is updated, your custom work never changes and remains exactly how you left it.
So simply put, here is how to think about it. The parent theme is the original house. The child theme is what you have relatively made on top of the parent theme. Your extension remains the same even if someone chooses to repaint over the original house.
How to Create a Child Theme the Easy Way
You do not need to write any code to create a child theme. The simplest method is a free plugin called Child Theme Configurator. The complete procedure of the process is presented below.
Step 1 — Go to Plugins in your WordPress dashboard and click Add New.
Step 2—Search for Child Theme Configurator and install the plugin.
Step 3—Once activated, go to Tools and then select Child Theme from the menu.
Step 4 — Choose your current active theme from the dropdown list.
Step 5 — Click the Analyze button so the plugin can scan your existing theme.
Step 6 — Click Create Child Theme and wait a few seconds.
Step 7 — Go to Appearance, then Themes, and activate your newly created child theme.
That is all there is to it. Your current customization work will store all your changes through the child theme starting from this moment. Your changes will remain intact because of system updates, and you can always use the parent theme as a secure backup option whenever problems arise.
The most professional development practice for building websites needs developers to use child themes for their work. The standard approach used by every reputable WordPress customization service and every experienced WordPress developer working on real projects requires them to use this method.
Step 4: Design Visually With WordPress Page Builders
WordPress page builders will be the most powerful tool for you in case you want design freedom on every level without messing with a code block at any stage. These plugins take over the standard WordPress editor, and instead, you are given a visual drag-and-drop canvas to work with. Click on any element of the page, drag and drop it wherever you want it to be, and then set its style instantly in real time.
Elementor—The world’s number one page builder. It provides hundreds of ready-made templates, a massive block library, and an editing environment that is smooth and intuitive for first-timers as well as professionals.
Beaver Builder — A neat, stable, and fast page builder for devs & agencies It generates slimmed-down code, is speedy to load, and performs extremely well on larger sites.
Divi Builder—Either bundled within the Divi theme or sold as a stand-alone plugin It has rich design modules and is popular with designers who intend to have controlled detailing of all elements.
Gutenberg Block Editor—Default WordPress editor (since v. 5.0) It constructs pages using content blocks and has matured a lot over the most recent updates. In fact, a number of the best modern themes are made to work with it seamlessly.
Unlike traditional, static pages created in code and based on designs from a designer who had formal training (or surfed Dribbble), WordPress page builders allow you to design and publish professional-looking landing pages, service pages, homepages, etc. without requiring even the slightest bit of coding or design knowledge.
But page builders have their limitations. If you are looking for advanced functionality—custom booking flows, membership portals, filters that have multiple conditions (for example, color = green + item type = chair), third-party integrations, or other complex logic built into their websites—the Instagram feed plugin is the right way. A plugin built for the job you want takes nothing more than what your site needs and skips loading all that extra builder code onto any of your pages.
Step 5: Get Your Colors, Fonts, and Typography Right
Furthermore, the difference between a website that looks professional and one where it starts to look thrown together almost always comes down to colors & fonts. They feel like little details, but they ultimately influence every aspect of a visitor’s experience with your brand.
Use two or three brand colors maximum. Select one main color and one supporting color in addition to a neutral (white or off-white). Use them uniformly on headings, buttons, borders, and highlights. Using too many colors gives a site an unprofessional and chaotic feel.
Use readable, clean fonts. Decorative fonts are fit for big display headings; however, ease is the way to go with body content material. So Roboto, Open Sans, and Lato amongst so many. A Montserrat as well! They are crisp and readable at all font sizes, with the knack for looking sharp on any screen.
Keep font sizes comfortable. A minimum of 16px is the acceptable size to use for body text. Headlines need to be significantly larger, allowing the user at a glance and without thinking to clearly see how your landing page is structured.
Give your content breathing room. White space—the room around content in images and sections, between text blocks—makes content feel breezy, balanced, and easy to digest. Crowded pages feel overwhelming. Well-spaced-out pages convey confidence and look premium.
Each and every single page should be consistent. When your homepage has one visual style and then your About page a completely different feel, it makes the entire website look like pudding pie. Choose your design language early, and then implement it everywhere—every time. No exceptions.
When It Makes Sense to Hire a Professional
DIY Customization — For the vast majority of common sites, this is extremely powerful. Note that there are cases when it’s worth consulting with a pro, not for the sake of convenience, but because that’s simply what more rational business dictated.
Your design is more than what any theme can provide. If you are developing a project that requires an entirely unique layout, custom animations, or interactivity features in your theme design—i.e., brand aspects not covered by even the best out-of-the-box template can create—then the only real solution is custom WordPress development. The dev builds your vision from the ground up—everything intentional, nothing boilerplate.
You require functionality beyond what current plugins can provide. Standard tools do not cater to all businesses. If you want a well-thought-out checkout process, an exclusive members-only area, perhaps even a custom booking system, and certain interaction with another platform, WordPress plugin development produces that functionality to the letter. Nothing borrowed, nothing unnecessary.
There is a direct correlation between your revenue and the site. There is no room for mistakes or downtime when your site pays the bills. When customizing your website with professional services, the work is done right from day one—ensuring that testing, performance optimization, and security standards are inherently present at every step of the process.
Just as knowing how to spade and shovel is essential, so too must you know when the time has come for an extra helping hand. Spending more time wrestling with your site than actually working on the business you are in is obviously the stronger of signs to call a specialist who eats and breathes custom WordPress development as part of their day, every day.
Best Practices to Customize WordPress Theme Every Beginner Should Follow
Before you finish, here are the habits that will help keep your site safe and ensure everything runs smoothly as you continue to customize elements in WordPress themes over weeks, months, or years.
Also, always back up before you change anything. Should an unforeseen event occur, five minutes of prep work can save your entire site. Install a plugin like UpdraftPlus to run automated backups on regular intervals, so you never have to remember!
Establish a Staging Site for Testing Purposes A staging site is essentially a duplicate of your live website that only you can access. Changes made there are only seen by visitors once you press the move to live button. This typically comes 100% free of charge with most good hosting providers.
Play within your child theme. Do NOT directly edit the parent theme. All customizations go in the child theme, seeing that every future update that is pushed out by the theme developer will not affect any of these files.
Be selective with plugins. The more plugins you install, the much more code is added to your site, which will lead to performance issues and potential security vulnerabilities. Take your time and remove everything you have sitting idle (unless you truly use it).
After every update, test on mobile. More than half of the global web traffic originates from mobile devices. After every single change, open it on a real phone and check that everything looks and works exactly as well there as it does on a desktop screen.
Limit themes only to those you trust. The official theme directory from WordPress.org and suppliers such as Astra, GeneratePress, or OceanWP are sound selections. Completely free themes from random third-party sites can include hidden malicious codes and as a consequence expose your whole site to risk.
Conclusion
One of the most powerful skill sets you can have as a website owner is learning how to customize WordPress theme settings! It kills your dependency on developers for everyday tweaks, provides full creative freedom, and lets you create a site that looks exactly like the rest of your brand.
Use the WordPress Customizer primarily—it is safe, visual, and can deal with most of the changes that any website ever needs. When you are ready for more, create a child theme and edit those WordPress themes like it is nothing. WordPress page builders are the best choice when you want to do all-step control but not a single line of code.
What happens when your project scales too much and templates and builders are not enough? And that is when you need to hire professionals. Whatever the stage (or budget) your project is at, someone has likely dealt with it. Similar to WordPress plugin development that helps you expand functionality in a big way or a full custom wordpress development build from scratch, there are experts for everything.
WordPress is one of the few platforms that really scales up with you. Take your inspiration with you from where to place the cord, increase confidence in every step, and develop a website that builds more business and expands. Now with this whole guide at your disposal, you are all set to get started today.
Unlock your WordPress dashboard, head over to the Customizer, and start off with crafting a website that is worthy of your brand.
FAQs
Custom WordPress development ensures your site reflects your brand identity, enhances performance, and provides tailored functionality beyond templates, helping you achieve professional design, seamless navigation, and higher conversions without unnecessary complexity.
No, beginners can customize themes using built‑in tools and page builders. However, custom WordPress development offers advanced solutions when your project requires unique layouts, specialized features, or complex integrations beyond standard plugins.
You should consider custom WordPress development when your website demands unique functionality, advanced performance optimization, or brand‑specific design elements that standard themes and plugins cannot deliver, ensuring scalability and long‑term business growth.
Yes, custom WordPress development creates tailored checkout flows, secure payment gateways, and personalized shopping experiences. It ensures your e‑commerce site performs reliably, scales effectively, and delivers a professional user experience aligned with your brand.
Templates provide generic designs, while custom WordPress development builds unique solutions aligned with your business goals. It enhances branding, improves site performance, and ensures your website stands out with professional functionality and lasting impact.